
Three parts slide together in a satisfying way to create a cube. Once assembled it needs to be held and moved in specific directions to separate. A .3mm clearance allows for smooth movement without binding. thingiverse ![]()
See also Slideways Cube Puzzle. thingiverse ![]()
YOUTUBE F_T_tMMpWjQ Published Jun 23, 2018.
.
I printed this in onyx nylon at four hours each for the three identical parts. enlarge 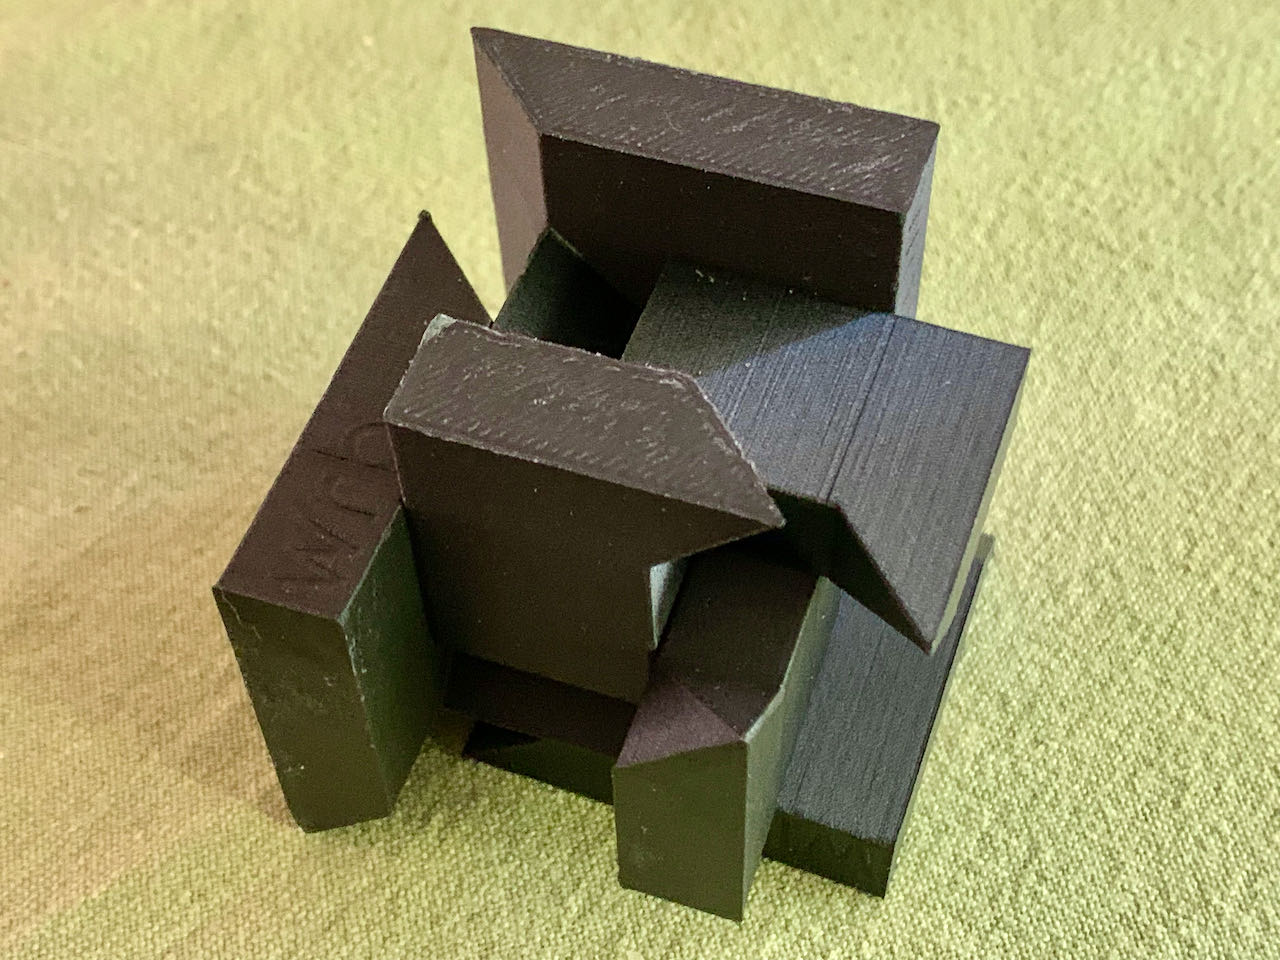
Friction made solving the puzzle more difficult as the parts need to move each other as they slide together. I tried smoothing with an emery board with little effect. But with gravity's help it will fall apart.
//scad.fed.wiki/assets/viewstl/viewstl.html?stl=http://scad.fed.wiki/assets/pages/puzzle-cube/puzzle-cube.stl HEIGHT 370
This site's viewstl script failed on the thingverse stl. Openscad imported it and then export a satisfactory file.
import("wildrosebuilds_puzzlecube.stl");
# Disassembly
Our print included "wrb" engraved on each piece. Pinch one piece with the wrb upright, facing you, with your left hand touching the top and bottom parts on the single piece. You can squeeze hard without interfering with other part motions.
Tilt the the assembled cube such that the left edge of wrb's w is pointing straight up. Tilt the remaining face top towards you. This arrangement invites gravity to help with the disassembly. enlarge 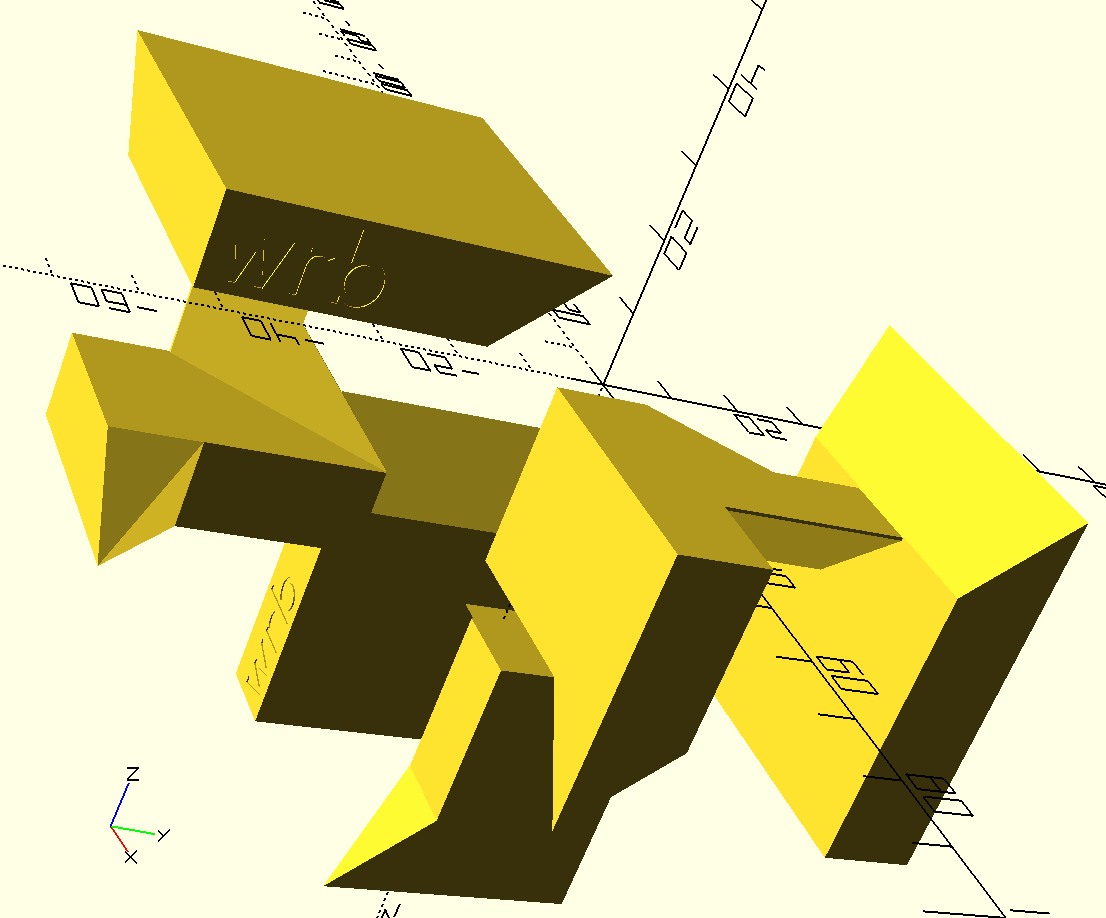
Tap the small end of the trapped piece that is exposed at the center of the face tilted in your direction. This will jiggle the assembly such that gravity can do its work.
Note the way pieces start moving. Help them along any way that works for you.
# Reassembly
Reassembly is made a challenge because the three parts must move together to get past the point where all three are engaged and sliding against each other. This is made simpler by confining two parts to slide on a level surface and the third to drop in from above. enlarge 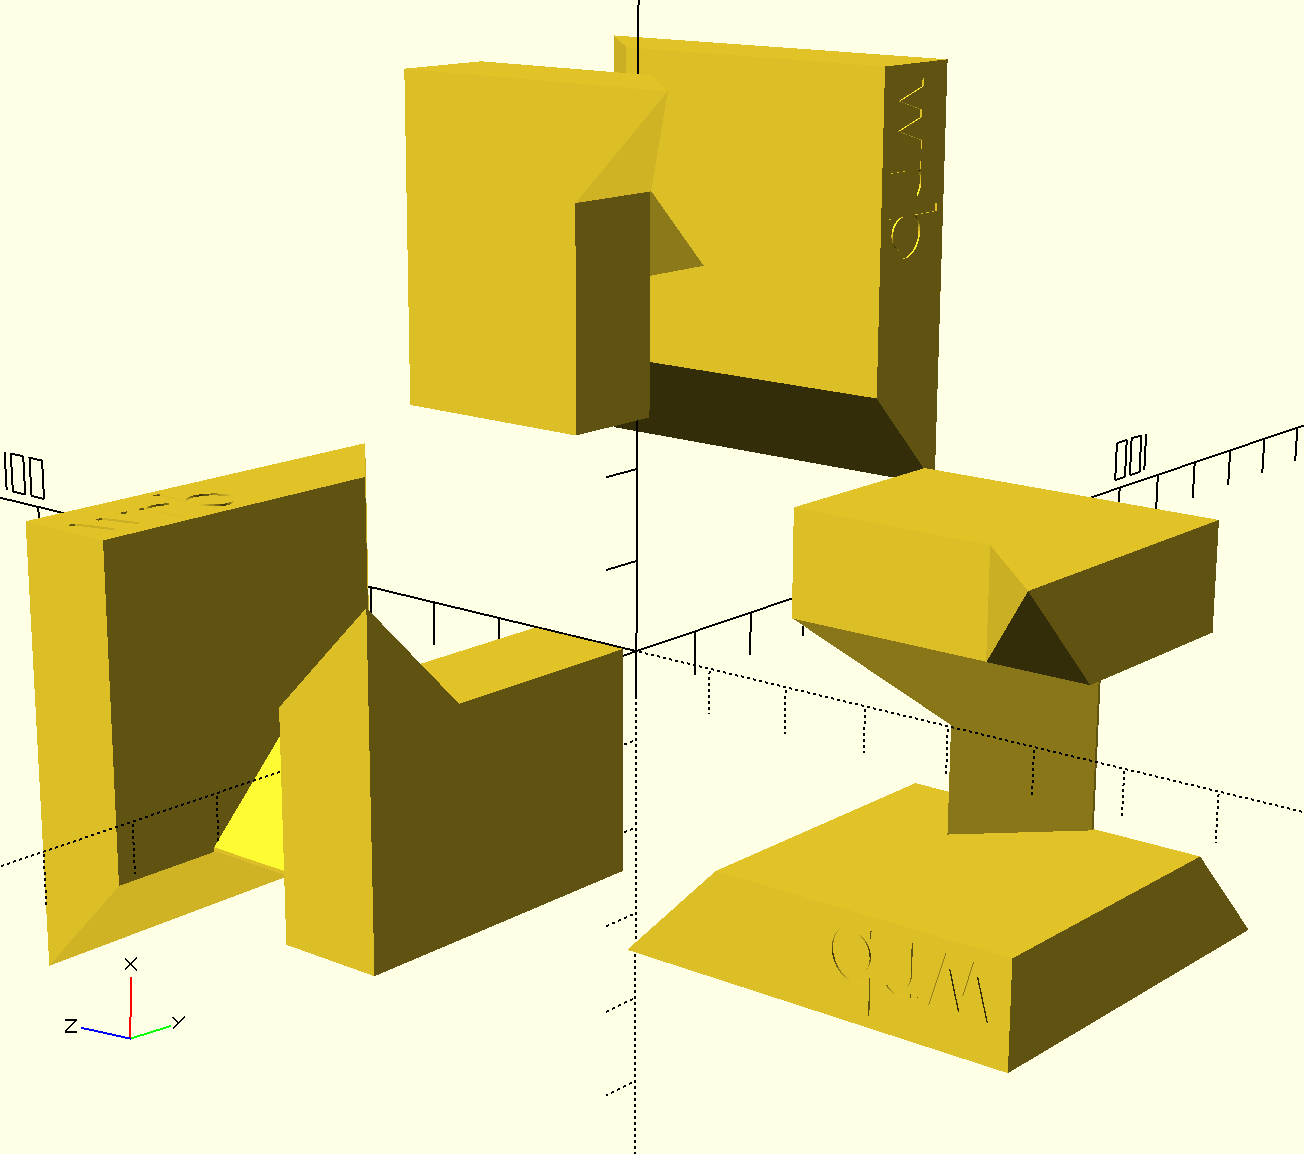
Arrange two parts such that they slide together. One part will have its large flat side facing down. The other with the wrb engraving facing up. Feel how the angled faces rub when pressed the right way. Notice when they disengage when separated. It is where the puzzle is solved when the two parts reengage and the third part joins them.
Arrange the third part so that when descending its most pointy part will join with the other pointy parts to make one distinctive corner of the finished cube. Slide all three parts together while they engage each other simultaneously.
# Modeling
I translated the part by y = -15 which placed the rotational center at the origin. I added more copies rotated by the twists required to make them fit without overlapping.
module part() { z = -20*(1+cos($t*360)); translate([0, -15, z]) import("wildrosebuilds_puzzlecube.stl"); } twist = [0,90,90]; part(); rotate(twist) part(); rotate(twist) rotate(twist) part();
I animated the assembly by adding an offset z to all copies and computing that offset from $t, the animation variable that runs between 0 and 1 in 50 steps. When this looked right on the screen I chose "dump pictures" to create 50 pdf images that imagemagick converted to gif.
convert 'frame*.png' -set delay 1x10 animated.gif
# Hollows
With experiments in Blender we hoped to reveal more clearly the internal structure of the assembled cube. Theses suggested hollow regions. Here we subtract our model from a solid cube and find no such empty space.
//scad.fed.wiki/assets/viewstl/viewstl.html?stl=http://scad.fed.wiki/assets/pages/puzzle-cube/hollows.stl HEIGHT 370
.
See Cubic Trisection